If you are deciding what to carry for an e-bike flat tire, build the kit around the wheel hardware on your actual bike, not around a generic bicycle checklist. A spare tube, inflation method, levers, and a patch backup cover the basics, but the ride kit is only complete when it also accounts for valve type, axle access, and the kind of roadside stop you can realistically manage.
Quick answer
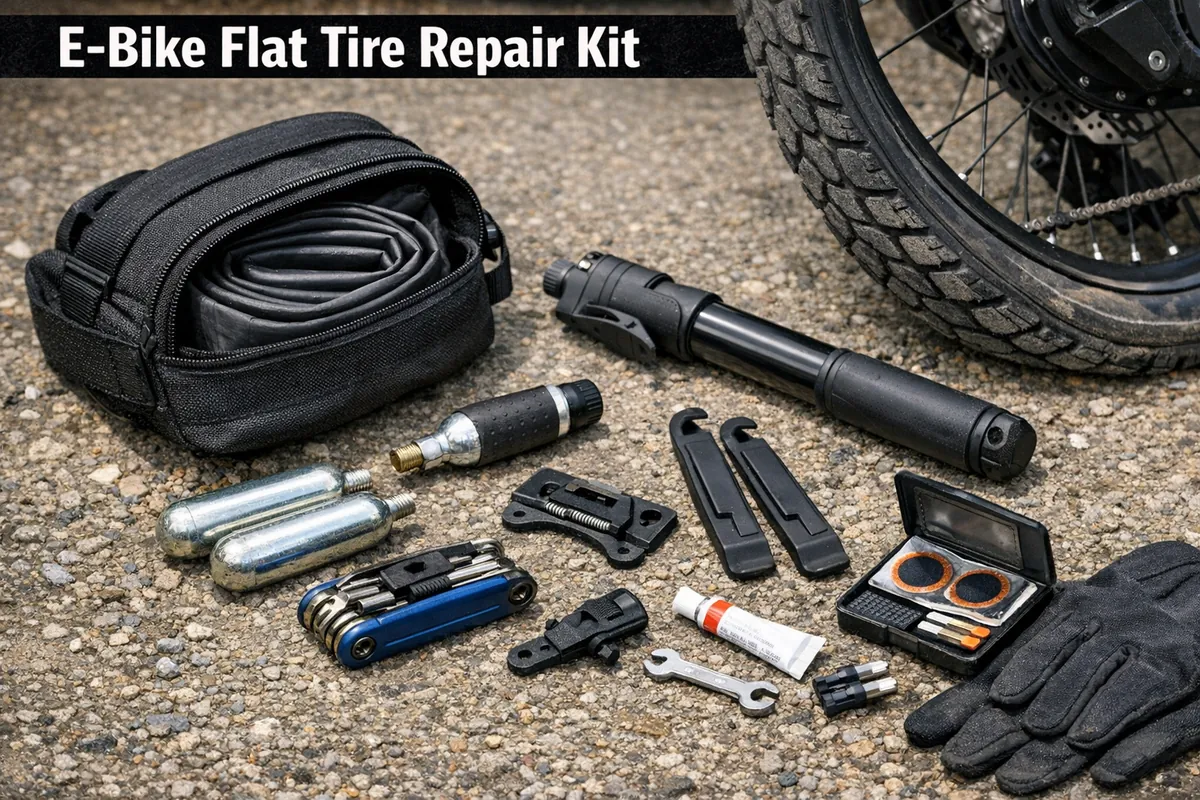
A practical e-bike flat-tire kit usually includes one correctly sized spare tube, a pump or CO2 inflator you know how to use, durable tire levers, and a patch option in case the first repair does not hold. Add any axle tools or security keys your bike needs so the wheel can actually come off when the tire goes down.
Roadside kit priorities that matter most
| Check | What belongs in the bag | Why it matters on the roadside |
|---|---|---|
| Basic repair | Tube, levers, inflation tool | These cover the most common tube-swap job without forcing improvisation. |
| Bike-specific access | Axle wrench, hex key, or security tool | A wheel that cannot come off makes the rest of the kit irrelevant. |
| Backup plan | Patch kit, gloves, rag, valve adapter | These small extras help when the first repair gets messy or incomplete. |
The minimum kit starts with the part most likely to save the ride quickly: a spare tube that matches the wheel size and valve style already on the bike. Pair it with sturdy tire levers and an inflation tool you have tested before. Some riders prefer a mini pump because it is reusable; others prefer CO2 for speed. Either can work if you know how to use it without guessing.
That basic set covers many routine flats, but it helps to think one step past the first repair. A tube can get pinched during installation, a puncture can be harder to find than expected, or a valve problem can change the plan. A small patch kit, a spare valve core if your setup uses one, and a simple rag or gloves can keep a manageable stop from turning into a frustrating roadside mess.
Space matters too. The best bag is the one that stays on the bike or in your riding routine instead of being left in the garage. A compact but complete kit usually beats a larger bag full of overlapping tools you never reach for.
This is where many kits fail. Some e-bikes use axle nuts, torque arms, or anti-theft hardware that a standard bicycle multi-tool will not handle. Hub-motor bikes can be even less forgiving because the wheel is not just another quick-release part. If a flat requires specific wrenches, hex keys, or a security key, those items belong in the bag every time.
The safest way to decide what belongs in the kit is to do one calm practice removal at home. Confirm which side of the bike you need to approach, which tool sizes fit, and whether cable routing or tight clearances make the job slower than expected. That practice run reveals the missing piece before you are standing on the shoulder of the road trying to remember which wrench lives in the toolbox.
Even if you rarely remove the wheel yourself, the right hardware still matters. A friend, shop, or ride partner can only help if the required tool is present.
Beyond the obvious repair items, a few low-bulk additions make the whole process more realistic. A small pair of gloves keeps sealant, road grit, and chain grease off your hands. A rag gives you somewhere to set dirty parts and wipe the tire before reinstalling the tube. If your tires and valves differ across bikes in the household, labeling the spare or carrying the correct adapter prevents a simple mismatch from ending the ride.
It also helps to match the kit to how and where you ride. Short neighborhood trips may call for a lighter setup than longer commutes or trail detours where walking home is harder. The goal is not to carry a workshop. The goal is to carry the smallest set of items that lets you deal with a common flat without depending on luck.
The most common mistake is assuming any tube, any inflator, and any multi-tool are close enough. They are not if the valve type is wrong, the inflator cartridge is missing, or the axle hardware needs a tool that never made it into the bag. Another common miss is carrying the equipment but never checking whether it still matches the bike after a tire, wheel, or accessory change.
A second mistake is packing a kit you cannot use under normal roadside pressure. If the lever choice is too flimsy, the pump is hard to operate, or the wheel-removal sequence is unfamiliar, the stop takes longer and the odds of damaging the tube or tire go up. A short home practice session exposes those weak points quickly.
Finally, avoid turning the bag into a random pile of extras. A repair kit should feel deliberate: one clear tube option, one inflation plan, one verified way to access the wheel, and a few backups that solve predictable problems.
Practical callout: Practice a flat repair once at home with the same tools you plan to carry. If the wheel is awkward to remove or the inflator is confusing in a calm setting, it will feel worse when the tire is flat and the ride is interrupted.
For broader background, review this supporting reference and this additional safety source.

